I still remember the exact moment when the idea for this No Bake Eggnog Pie clicked for me. It was one of those cozy winter afternoons, the kind where the whole house smells like cinnamon and nutmeg, and I was craving something that captured all those festive vibes without spending hours in the kitchen. I wanted a dessert that felt indulgent but was actually pretty chill to make. That’s how this easy No Bake Eggnog Pie came into my life — a creamy, dreamy treat packed with the warm, spiced flavors of classic eggnog but without the oven hassle.
Gather These Ingredients:
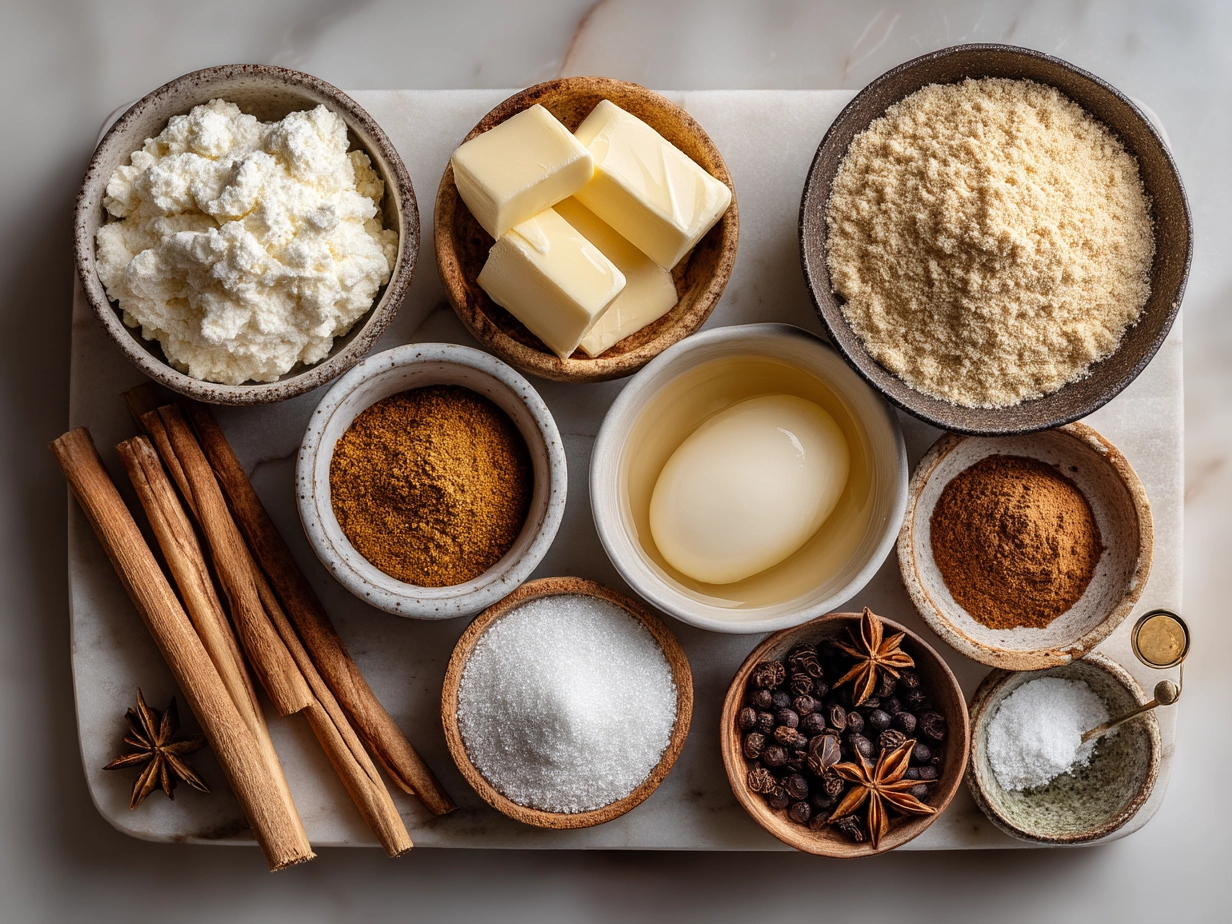
Pulling off a killer No Bake Eggnog Pie starts with simple ingredients that bring big personality to every bite. Here’s what you’ll need to get this pie on your table:
- 1 ½ cups vanilla wafer crumbs (You can substitute graham cracker crumbs for a little nutty flair!)
- 6 tablespoons unsalted butter, melted (This binds the crust perfectly. I always reach for real butter for richness.)
- 2 cups eggnog (Look for a creamy, well-spiced eggnog in the dairy aisle or international section to get those signature flavors!)
- 1 (8-ounce) package cream cheese, softened (This gives the filling that luscious creaminess.)
- 1 cup powdered sugar (Classic sweetener that blends smoothly.)
- 1 teaspoon vanilla extract (Adds depth—don’t skip!)
- 1 teaspoon ground cinnamon (This spice is the heart of that classic eggnog taste.)
- ½ teaspoon ground nutmeg (Freshly grated if possible. It amps the holiday vibe.)
- 1 cup heavy cream (For whipping up that fluffy top layer—you’ll want it cold.)
Want to switch things up in your No Bake Eggnog Pie? Try using a gingersnap cookie crust instead for a spicy crunch. Or swap in almond milk eggnog for a lighter twist. For extra flavor pop, a splash of rum extract in the filling sends this pie straight into festive territory.
Quick tip: If you’re short on time, grab pre-made cookie crumbs and softened cream cheese from the fridge the night before. This No Bake Eggnog Pie comes together with pantry staples and a few flavor heroes that make all the difference, so quality ingredients really shine here!
Let’s Make This Happen!
Ready to whip up your No Bake Eggnog Pie? The whole process takes about 30 minutes, plus chilling time. Here’s how we do it:
- Crust time! In a medium bowl, mix the vanilla wafer crumbs with melted butter until the mixture looks like wet sand. Press this mix evenly into a 9-inch pie dish to form your crust. Pop it in the fridge to chill while you make the filling.
- Mix cream cheese and sweetness: In a large bowl, beat the softened cream cheese with powdered sugar until smooth and creamy. This step is where the magic happens in your No Bake Eggnog Pie—don’t skip it!
- Spice it up: Stir in the vanilla extract, ground cinnamon, and nutmeg. Your kitchen already smells like a holiday wonderland.
- Add eggnog: Slowly pour in the eggnog while mixing at low speed, making sure the filling stays silky without lumps.
- Whip it: In a separate bowl, whip the heavy cream to soft peaks. Gently fold the whipped cream into your eggnog filling to keep things light and airy.
- Fill your crust: Spoon the filling over the chilled crust, smoothing out the top.
- Chill and set: Cover your No Bake Eggnog Pie and let it chill in the fridge for at least 4 hours—or overnight if you can wait that long. You’ll know your pie is ready when the filling is firm but still spoonable.
If your No Bake Eggnog Pie seems a little too loose, don’t panic. Whip up the cream a bit stiffer and fold it in gently. I learned from my early tests that creaminess is key, but overmixing can weigh it down.
While your pie chills, go ahead and check out my other seasonal favorites like my Jam Donut Focaccia or the TikTok Baked Feta Pasta with Pesto for more flavor-packed inspiration.
Serving Ideas & Pairings!
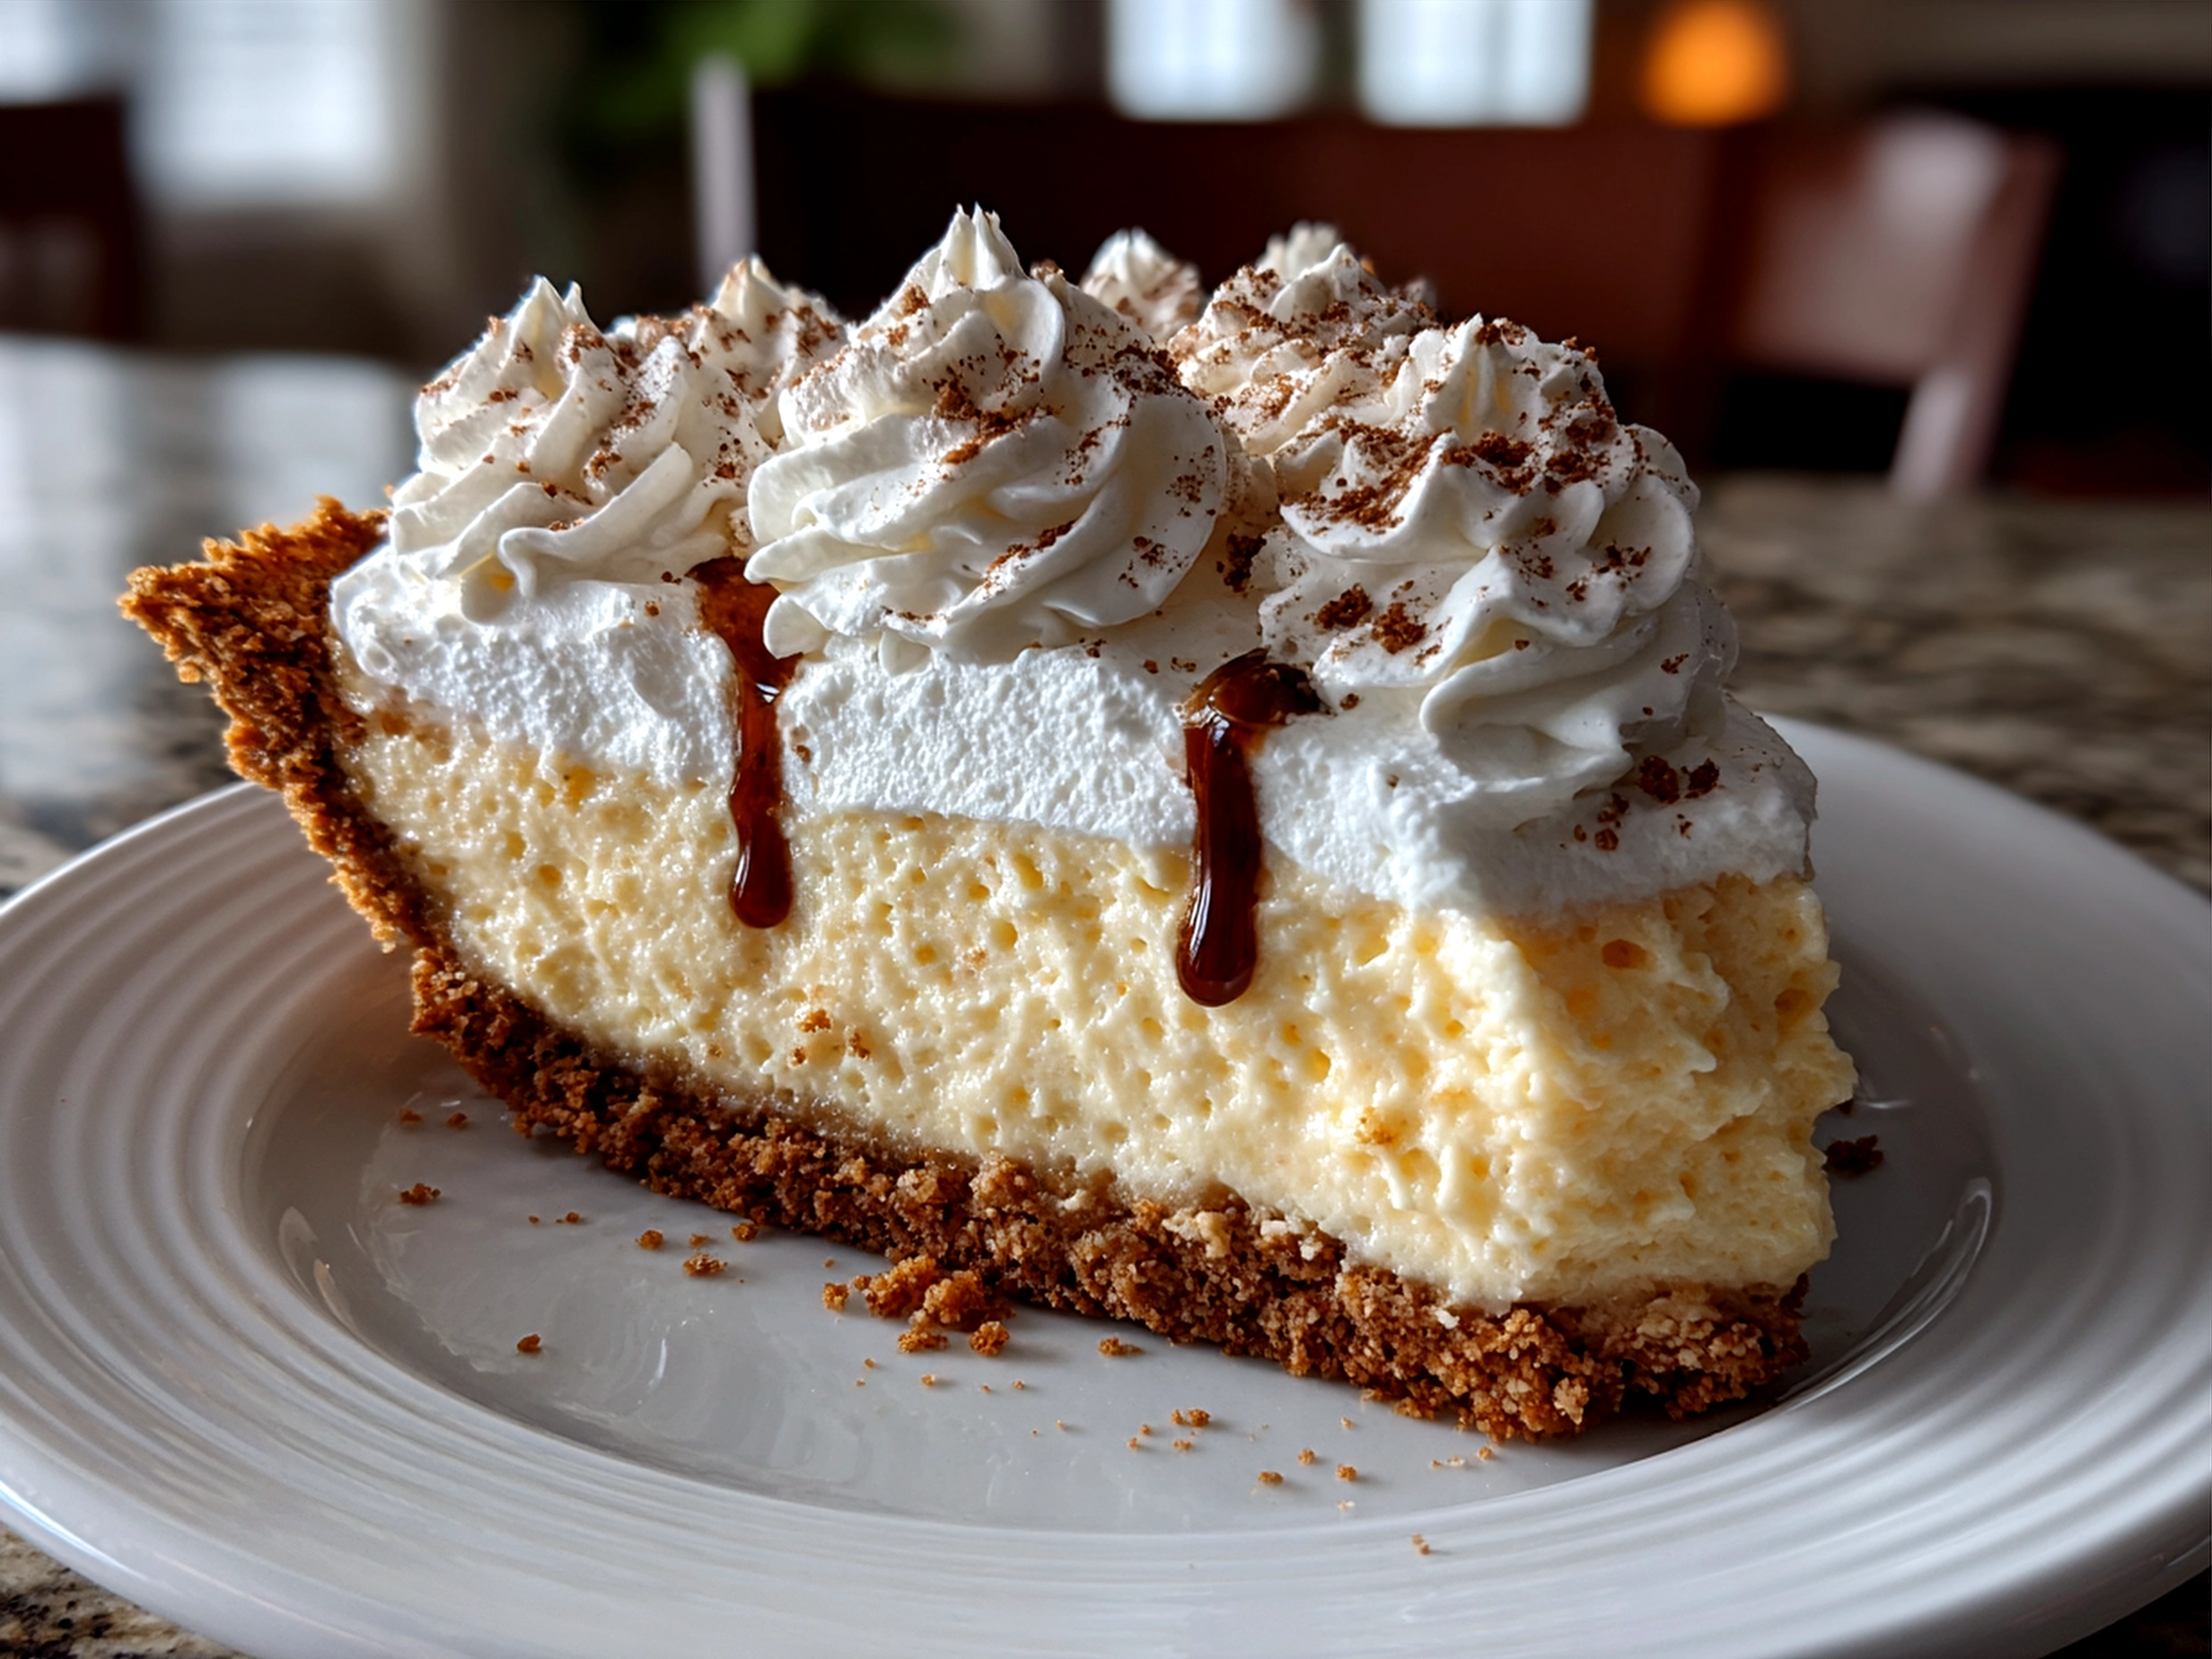
This No Bake Eggnog Pie is one of those desserts that feels like a little party every time you serve it. My go-to way to dig into this pie is chilled, topped with a dusting of extra nutmeg and a dollop of whipped cream. It’s dreamy on lazy weekends or when I’m feeding a hungry crowd during the holidays.
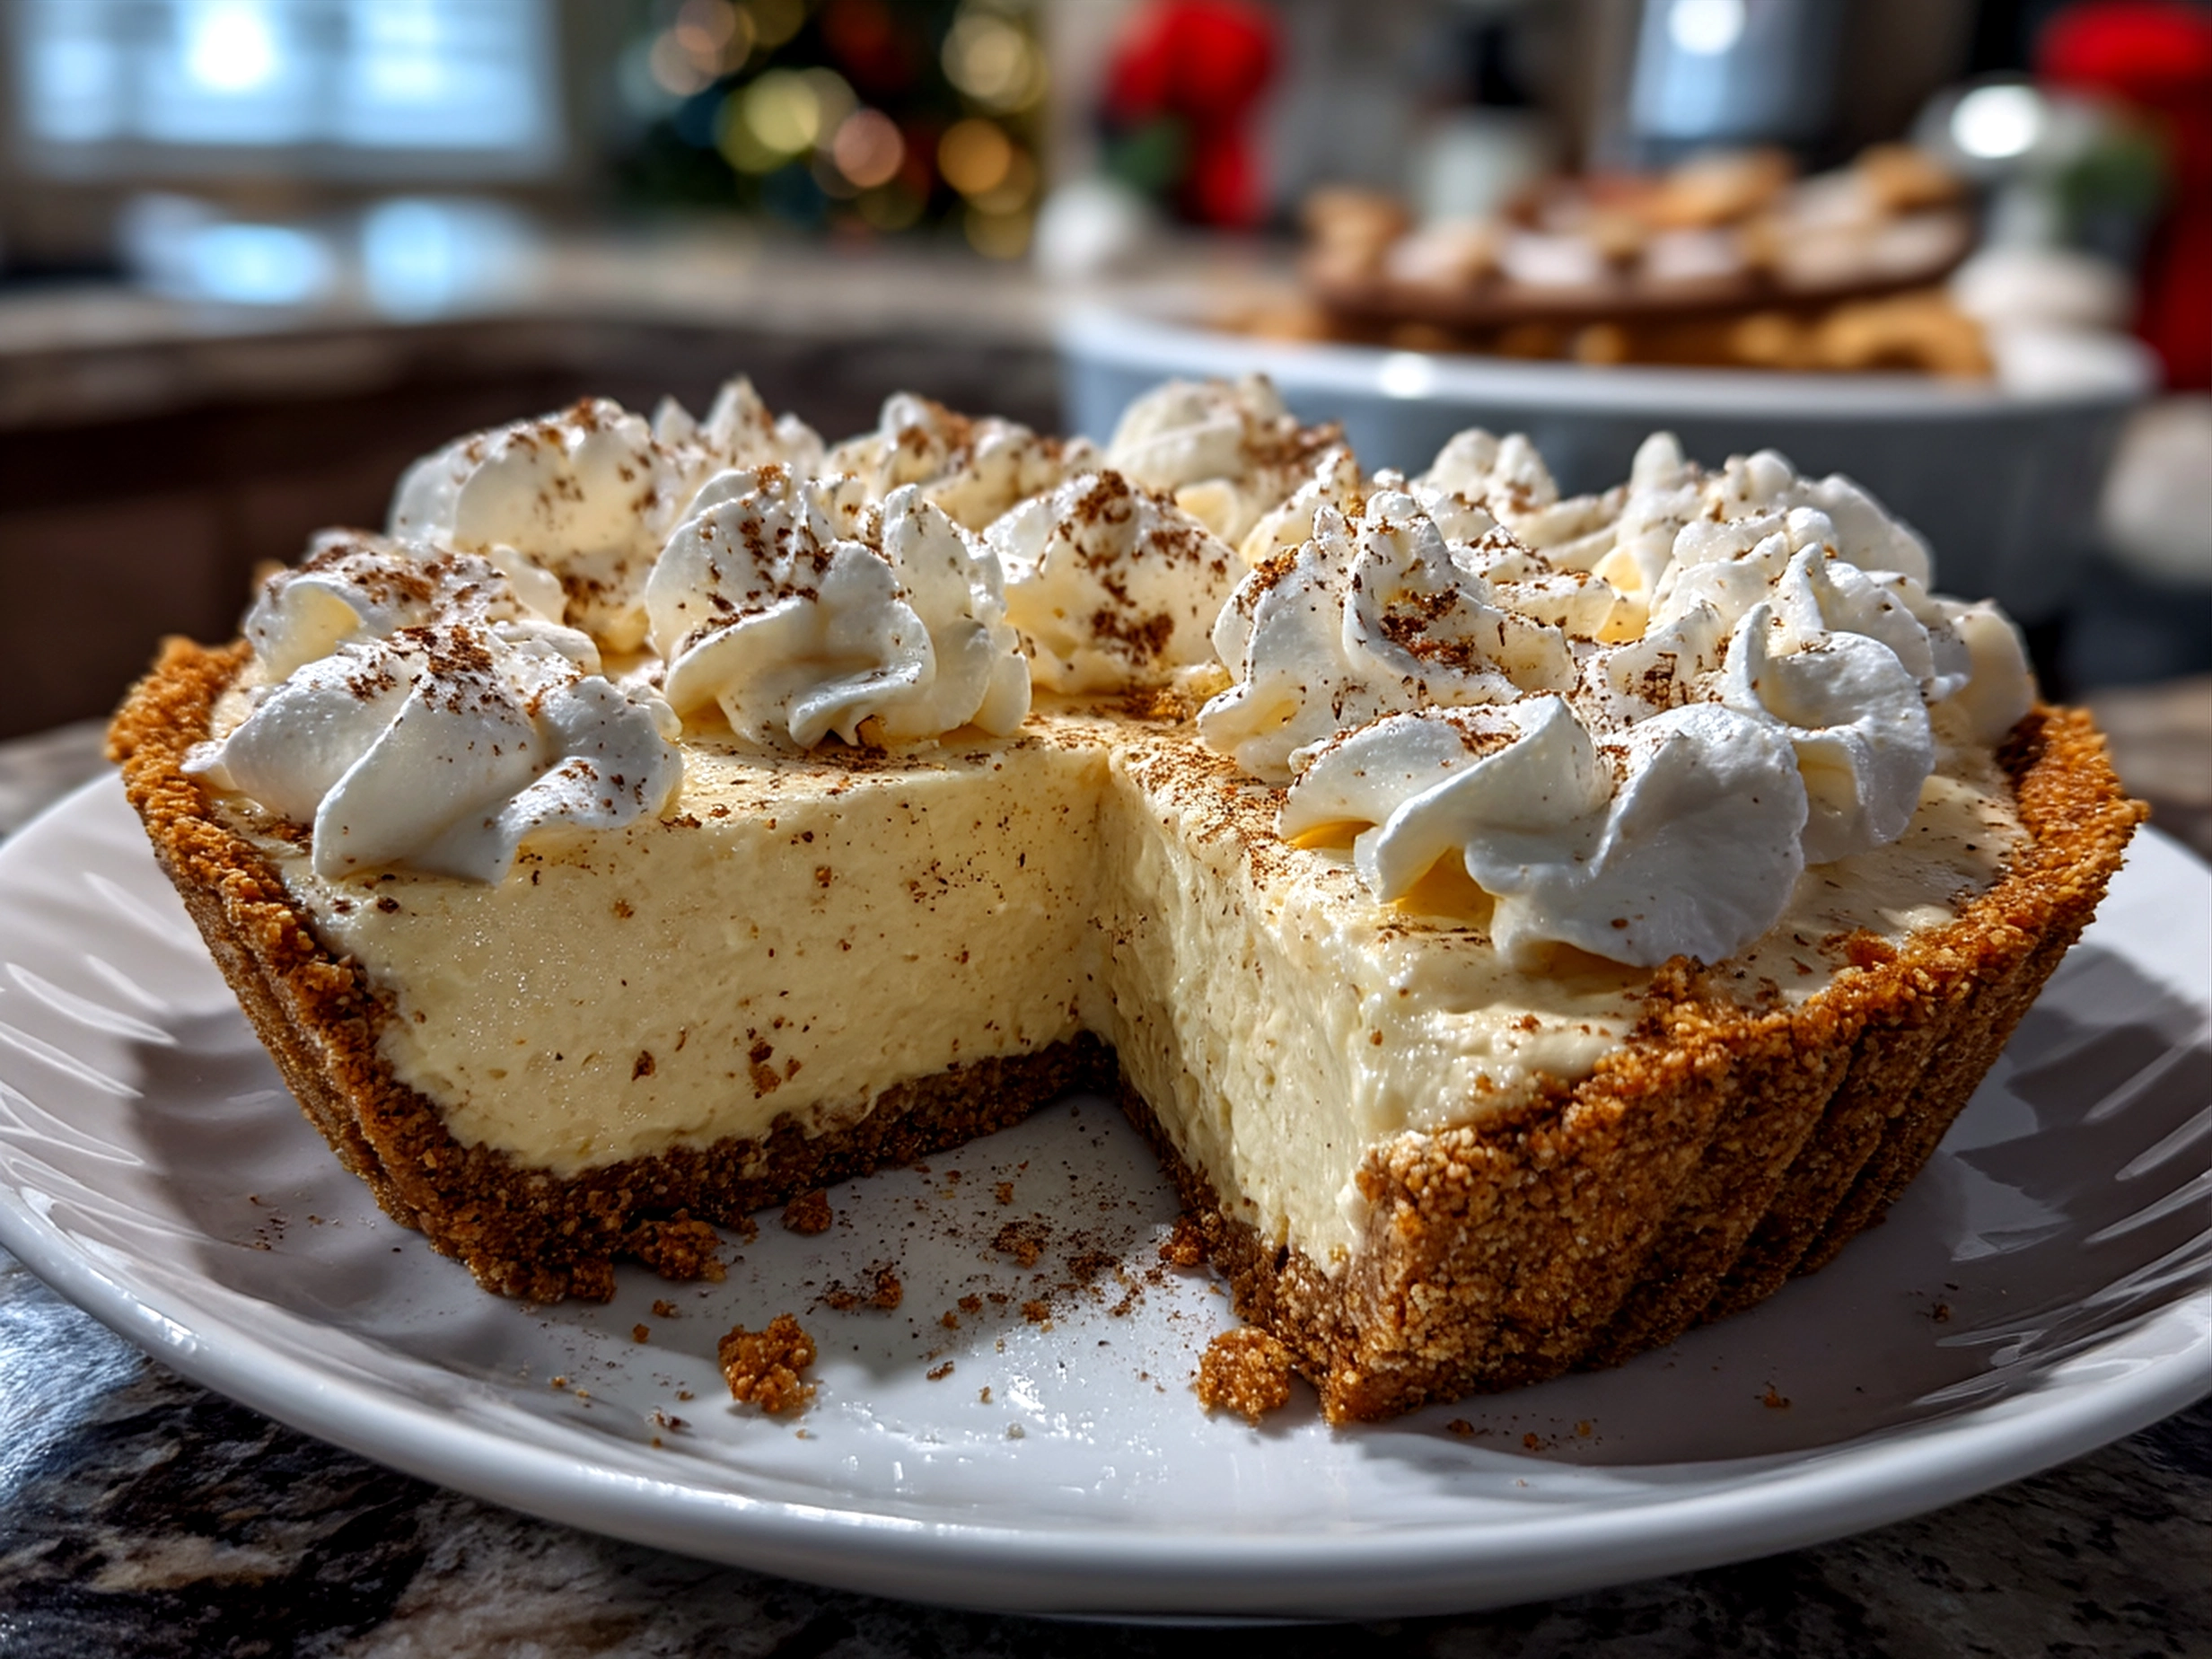
For sides, this eggnog dessert shines alongside spiced cookies or a warm glass of mulled cider. The crust’s vanilla base keeps things cozy, while the creamy filling invites you to savor every bite. Want an extra festive touch? Sprinkle crushed peppermint candies on top or serve with a drizzle of caramel sauce.
This easy no bake pie is perfect for holiday potlucks, last-minute gatherings, or a sweet finish after a big family dinner. Leftovers? Oh yes! This pie stays creamy and fresh in the fridge for several days—great for morning coffee pairing or even a late-night snack.
If you love this Christmas eggnog pie, you might also appreciate the creamy, no-fuss vibe of these No Bake Red Velvet Snowball Truffles. They share that quick holiday dessert magic!
Common Questions About This Recipe
Can I prep this No Bake Eggnog Pie in advance?
Absolutely! In fact, letting it chill overnight gives the flavors time to marry and the filling a firm yet silky texture. It’s a great make-ahead dessert for hectic holiday days.
What can I use instead of vanilla wafers for the crust?
Graham crackers or gingersnap cookies work beautifully. I’ve tested both, and they add unique vibes — graham for mellow warmth, gingersnap for a spicy kick.
Is there a dairy-free version of this No Bake Eggnog Pie?
I’ve tried substituting coconut cream for the heavy cream and almond milk-based eggnog. The texture shifts a bit but it’s still delicious for those avoiding dairy!
Can I add alcohol to this pie?
Yes! A splash of rum or bourbon can deepen the flavors and make this pie a boozy holiday treat. Just adjust the eggnog quantity so the filling stays firm.
How do I fix a filling that’s too runny?
If your pie isn’t setting as firm as you want, whip the heavy cream a little longer next time or add a tablespoon of instant vanilla pudding mix to the filling. That trick saved my early experiments!
Can I double or halve this No Bake Eggnog Pie recipe?
Yes, scaling works well. Just adjust your pan size accordingly. For a smaller batch, go for a tart pan or mini pie dish to keep things perfectly portioned.
What’s the best way to store leftovers?
Keep the pie tightly covered in the fridge for up to 3 days. If you’re looking for fresh flavor, a quick sprinkle of nutmeg right before serving brightens it up nicely.
If you want to see how others are making their no bake holiday pie classics, check out this inspiring No Bake Holiday Dessert! Mistie makes a vanilla spice eggnog pie. For another take, this no bake eggnog pie recipe on Love Bakes Good Cakes reminded me of the comforting flavors I love. Also, here’s an easy no bake dessert share by a fellow fan easy no bake dessert this easy egg nog pie is great for the holidays.
My Final Take
Why does this No Bake Eggnog Pie hold a place on MilaBites’ recipe list? It’s that perfect combo of fuss-free, festive, and full-flavored. Not to mention, it’s become a crowd favorite at my holiday table because it delivers all the eggnog goodness without any complicated steps or weird ingredients. Plus, experimenting with different crusts and flavor twists has kept this recipe exciting for years.
My Top No Bake Eggnog Pie Tips:
- Always soften cream cheese fully for the smoothest filling.
- Whip your heavy cream to soft peaks and fold gently to keep it light and airy.
- Don’t rush the chilling—it’s what gives the pie its perfect sliceable texture.
I’ve tried variations with a gingersnap crust, added espresso powder for a mocha touch, and even swapped in bourbon for a boozy holiday twist. The one that brings the most compliments? The classic version with vanilla wafer crust and just the right sprinkle of nutmeg on top.
This No Bake Eggnog Pie is a recipe keeper that makes me smile every time I serve it. If you love quick, flavorful desserts that aren’t fussy, I encourage you to try it, play with it, and make it your own holiday tradition. Cooking should feel like a flavor adventure, and trust me—this pie will bring you sweet, creamy joy right from your kitchen to your table. Happy baking, and here’s to your next unforgettable slice of No Bake Eggnog Pie!
No Bake Eggnog Pie
This creamy and festive No Bake Eggnog Pie is the perfect holiday dessert, combining rich eggnog flavor with a smooth, velvety texture in a simple graham cracker crust.
- Prep Time: 15 minutes
- Cook Time: 0 minutes
- Total Time: 4 hours 15 minutes
- Yield: 8 servings
- Category: Dessert
- Method: No-Cook
- Cuisine: American
Ingredients
- 1 1/2 cups graham cracker crumbs
- 1/4 cup granulated sugar
- 6 tablespoons unsalted butter, melted
- 1 cup eggnog
- 1 (3.4 oz) package instant vanilla pudding mix
- 1 cup heavy whipping cream
- 2 tablespoons powdered sugar
- 1/2 teaspoon ground nutmeg, plus extra for garnish
- 1 teaspoon vanilla extract
Instructions
- In a medium bowl, mix graham cracker crumbs, granulated sugar, and melted butter until evenly combined.
- Press the crumb mixture firmly into the bottom and up the sides of a 9-inch pie plate to form the crust. Chill in the refrigerator for 10 minutes.
- In a mixing bowl, whisk together the eggnog and instant vanilla pudding mix until smooth and thickened, about 2 minutes.
- In a separate chilled bowl, beat the heavy cream, powdered sugar, nutmeg, and vanilla extract until stiff peaks form.
- Gently fold the whipped cream mixture into the eggnog pudding mixture until fully combined.
- Pour the filling into the chilled crust and smooth the top.
- Refrigerate the pie for at least 4 hours or until set.
- Before serving, sprinkle additional ground nutmeg over the top for garnish.
Notes
For an adult twist, add 2 tablespoons of spiced rum or bourbon to the filling mixture. Serve chilled with a dollop of whipped cream for extra indulgence.